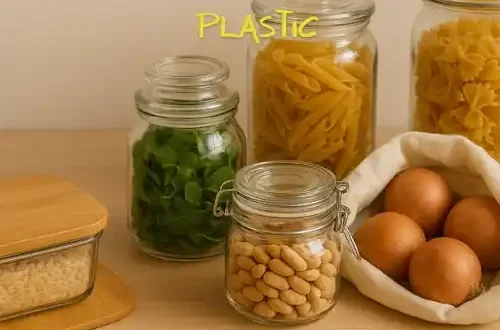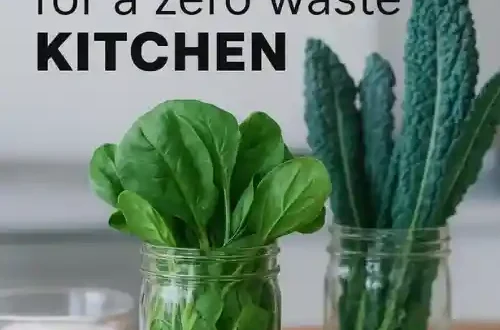
When I first began looking for a zero waste kitchen alternative to plastic, I realized that DIY reusable food wraps wax projects could turn everyday things into something useful. At first, I checked a local zero waste shop, but many of the ready-made options felt expensive.
Then I thought why not make my own? Ordering wax wraps online seemed easy, but I wanted something more personal and hands-on. With just a few old shirts from dad’s collection, I followed a simple instruction I found on my phone, and soon enough, I had a pile of super easy, cheap DIY reusable food wraps ready to use.
Over the next months, I noticed how much money and waste I was saving. Instead of using plastic wrap that doesn’t last, my homemade soya wax wraps held up well, even in the fridge.
They felt like a natural vegan option, especially compared to traditional bees wax wraps, and I loved knowing I wasn’t adding unnecessary kilograms of waste to the planet. I even showed mum, and now she makes her own too. These small swaps might look simple, but they’re powerful steps toward living lighter on the earth with DIY reusable food wraps.
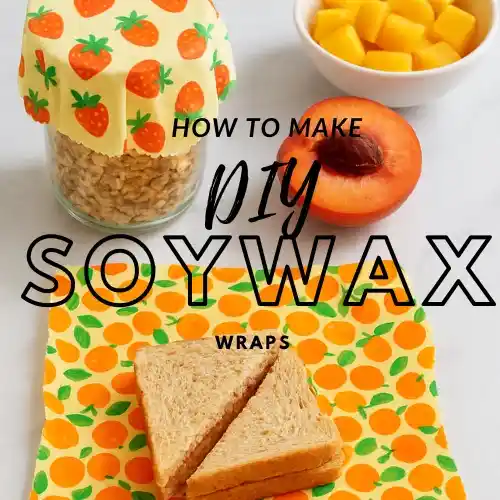
Soy wax wraps recipe
Making your own soy wax wraps is easier than it looks all you need are a few ingredients, the right ratio, and a little patience.
Ingredients
- ½ cup soy wax pellets
- 1 tablespoon coconut oil (for flexibility and stickiness)
- 100% cotton fabric (clean and pre-cut)
Instructions
- Melt the soy wax: Use a double boiler or heat-safe bowl over simmering water.
- Add coconut oil: Stir well until the mixture is smooth and fully blended.
- Prepare your fabric: Lay it flat on a parchment-lined baking tray.
- Brush on the mixture: Use a clean brush to coat the fabric evenly.
- Bake briefly: Place in a 200°F (93°C) oven for 2–3 minutes to let the wax spread.
- Smooth the surface: Once melted, brush again to ensure even coverage.
- Cool and dry: Hang or lay flat until completely firm.
Quick Tips
- Mix thoroughly uneven blending can cause rough or patchy finishes.
- Adjust the ratio slightly if you prefer more or less stickiness.
- Refresh wraps later by reheating and re-brushing with leftover wax mix.
How to make vegan wax DIY reusable food wraps
1. Design and cut your fabric.
Before you even melt the wax, the process starts with preparing your fabric the base that makes your wraps durable, flexible, and fun to use.
- Choose 100% cotton: Go for medium-weight cotton with eye-catching prints boho, floral, or cactus designs that bring personality to your kitchen.
- Use craft-quality material: It’s sturdy but still flexible enough to shape around bowls, jars, or snacks.
- Cut with precision: Templates help you make clean, even rectangles, but don’t be afraid to mix it up with circles or small squares.
- Try pinking shears: They prevent edges from fraying so your wraps last much longer.
- Get creative with sizes: A single fat quarter can make several wraps trim it into small, medium, and large pieces to suit different uses.
- Have fun with variety: Play around with shapes and patterns to make your wraps both practical and stylish.
2. Set up your oven.
Before melting the wax, it’s important to prepare your oven properly this ensures your wraps turn out smooth and evenly coated without creating a sticky mess.
- Preheat your oven: Set the temperature to around 200°F (93°C) warm enough to melt the wax evenly but not so hot that it burns or hardens too quickly.
- Use a cookie sheet or baking pan: Place it on the oven rack to serve as a stable base for your wraps.
- Add parchment paper: Always line your tray before placing the fabric this prevents wax from dripping onto your pan and makes cleanup effortless.
- Don’t skip this step: Skipping the paper can lead to melted wax sticking to your tray a nightmare to clean!
- Make it a routine: Once you get used to this setup, it’ll feel like second nature every time you make wraps at home.
3. Sprinkle the soy wax over the fabrics.
Once your fabric is cut and your oven is ready, it’s time to add the soy wax the key ingredient that turns plain cotton into a reusable wrap. Applying it the right way ensures flexibility and a smooth finish.
- Sprinkle lightly and evenly: Spread a thin layer of soy wax pellets over the entire surface of the fabric. You don’t need much just enough to lightly cover it.
- Start small: Add wax gradually instead of pouring too much at once. It’s easier to build up later than to fix an overloaded wrap.
- Check for balance: If certain spots look thin, gently sprinkle a bit more before melting.
- Avoid clumping: Too much wax can make the fabric stiff and hard to fold.
- Aim for smooth, breathable coating: A light, even layer keeps your wraps flexible and helps food stay fresh.
- Learn through practice: With a gentle hand and patience, your wraps will come out soft, neat, and perfectly coated every time.
4. Place the pan in the oven.
Now that your fabric is coated with soy wax, it’s time to melt it evenly. This step gives your wraps that smooth, glossy finish that makes them both beautiful and functional.
- Slide the pan into the oven: Place your prepared tray on the center rack for even heat distribution.
- Set a short timer: Melt the wax for just 2–3 minutes soy wax melts quickly, so a little time goes a long way.
- Watch closely: Keep an eye on the process to prevent overheating. Too much heat can make the fabric stiff, while too little leaves uneven coating.
- Look for a glossy finish: The perfect moment is when the wax turns silky and coats the fabric evenly.
- Remove carefully: Once melted, take the pan out and get ready to shape your wraps while the wax is still warm and pliable.
- Practice makes perfect: With a bit of experience, you’ll recognize that ideal melted texture every time.
5. Brush the melted wax evenly in the fabric.
Once the wax has fully melted, it’s time to brush it evenly over your fabric this step gives your wraps their smooth texture and lasting quality.
- Use melted soy wax: Soy wax is a great natural option easy to melt, non-toxic, and perfect for reusable wraps.
- Work while it’s warm: Make sure the wax is fully melted but not too hot before brushing it onto the fabric.
- Use a clean brush: Apply the melted wax evenly across the fabric surface, making sure every spot gets coated.
- Go for a smooth finish: Spread gently in long strokes to avoid heavy or patchy spots.
- Take your time: A consistent, even coating helps the wraps stay flexible and durable.
- Enjoy the process: Whether you’re crafting for yourself or as gifts, brushing on the wax feels rewarding like creating something sustainable and handmade with care.
6. Hang to dry.
After coating your fabric with melted soy wax, it’s time to let your wraps dry and set. This step helps them firm up evenly and gives that smooth, reusable finish you’re aiming for.
- Hang to dry: Use a drying rack, clothesline, or even hangers just make sure there’s enough airflow around each wrap.
- Choose a breezy spot: Fresh air helps the wax solidify faster and leaves your wraps with a clean, natural scent.
- Avoid stacking: Don’t layer the wraps while drying; keep them separated so the wax doesn’t stick together.
- Be patient: Drying doesn’t take long within minutes, you’ll notice the surface turning firm and smooth.
- Check for readiness: Once fully cooled, your wraps will be flexible, polished, and ready to use.
- Enjoy the result: This simple drying step transforms your project into durable, eco-friendly wraps that help you cut down on plastic and keep food fresh naturally.
How to Clean Your soy DIY reusable Food Wraps:
Keeping your soy wraps clean is simple but it’s a bit different from washing beeswax wraps. Because soy wax softens faster, gentle cleaning helps them last longer and stay smooth.
- Use cool water only: Warm or hot water can melt or damage the wax coating.
- Go mild on soap: Use a small amount of eco-friendly or gentle dish soap.
- Wipe for light messes: Clean small spills with a damp cloth dipped in soapy water.
- Rinse for bigger messes: Run under cool water and wash gently by hand.
- Avoid harsh scrubbers: Skip anything rough or abrasive that could scratch the surface.
- Dry naturally: Lay flat on a rack or hang until completely air-dried.
- Never use heat: Keep wraps out of dryers, microwaves, or direct sunlight heat melts wax!
- Store when dry: Once clean and dry, fold or roll your wraps for easy reuse.
Additional Tips:
- Handle your wraps gently to prevent small tears or cracks.
- Avoid folding too tightly or pressing under heavy items.
- Keep them dry and away from direct heat to extend their life.
- If they start to look worn, refresh them in the oven for a few minutes.
- A quick warm press can bring back their shine and flexibility.
- Regular care helps your wraps last for months instead of weeks.
- These small maintenance steps keep waste low and your wraps looking new.
Benefits of Soy Wax DIY reusable Food Wraps:
- Eco-friendly: Helps reduce plastic waste and supports a sustainable lifestyle.
- Budget-friendly: Costs far less than buying single-use plastic wraps over time.
- Reusable: Can be used multiple times with proper care, cutting down waste.
- Made from natural materials: Soy wax is non-toxic and safe for food use.
- Customizable: Create different shapes, sizes, and patterns to fit your kitchen needs.
- Upcycles old fabric: A great way to reuse scraps or worn-out clothing.
- Long-lasting: With gentle care, wraps can stay usable for months.
- Easy to refresh: A quick warm press in the oven revives their look and texture.
- Healthier option: Free from harmful chemicals often found in plastic wraps.
- Satisfying to make: Turning simple materials into something useful feels rewarding and creative.